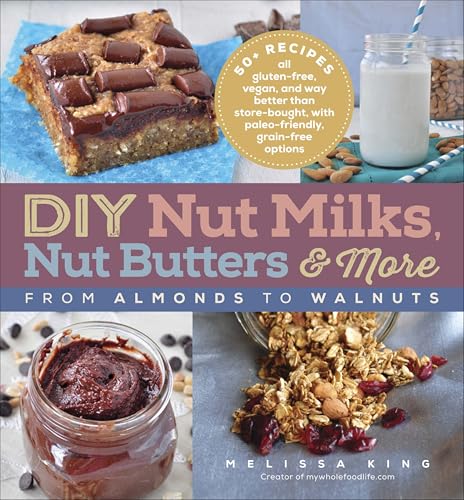
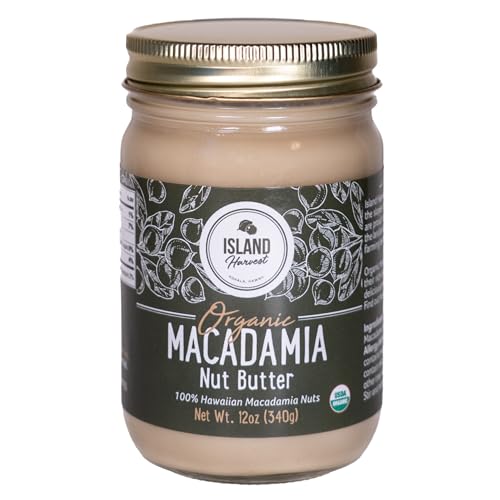
There’s something magical about making your own nut butter at home. The aroma of freshly roasted nuts, the creamy texture, and the ability to customize flavors make it so much more satisfying than store-bought versions. Plus, you get to skip all the unnecessary additives and enjoy a wholesome, delicious spread.
DIY Nut Butter Recipes For Spreads
Making your own nut butter is one of my favorite ways to create a healthy and versatile snack. Plus, you likely already have the tools and ingredients at home! I’ll walk you through the steps to craft creamy, flavorful nut butters—customized to your taste and dietary preferences.
Tools You’ll Need
- A high-speed blender or food processor
- A baking sheet
- Parchment paper
- A spatula
- An airtight glass jar or container for storage
Step-by-Step Instructions
1. Choose Your Nuts
Start with 2 cups of your favorite raw nuts. Almonds, cashews, peanuts, or hazelnuts work wonderfully. You can even try mixing nuts for a unique flavor, like half cashews and half almonds.
2. Roast the Nuts
Spread the nuts on a baking sheet lined with parchment paper. Roast them in the oven at 350°F for 8–10 minutes. Stir them halfway through to ensure even roasting. The roasting process brings out the natural oils and deepens their flavor, making the final butter rich and aromatic.
3. Blend to Perfection
Once roasted, transfer the nuts to your blender or food processor. Start blending at a low speed. At first, the mixture will look crumbly, but don’t worry! After 2–3 minutes, pause to scrape the sides with a spatula, then blend again. Gradually, the nuts will release their oils and become creamy—it usually takes about 5–8 minutes.
4. Add Flavor and Sweetness (Optional)
Here’s where the fun starts—customizing your nut butter! Add:
- 1 teaspoon of cinnamon for warmth
- 1–2 tablespoons of honey or maple syrup for sweetness
- A pinch of sea salt to enhance flavor
- A splash of vanilla extract for extra depth
Blend again until the additions are fully incorporated.
5. Store and Enjoy
Transfer your nut butter to a glass jar or airtight container. Store it at room temperature if you’ll finish it within one week, or refrigerate it for a longer shelf life of up to a month.
Ingredients
Making nut butter at home not only keeps things natural but also allows you to control every single ingredient. Fresh, wholesome choices create a spread that’s both nutritious and delicious. Here’s everything you’ll need to get started.
Common Ingredients For Nut Butters
These are the base ingredients that form the foundation of your nut butter. Feel free to mix and match to suit your taste or dietary preferences:
- Raw nuts or seeds: 2 cups (almonds, peanuts, cashews, hazelnuts, sunflower seeds, or pumpkin seeds work great).
- Neutral oil: 1-2 teaspoons (optional and helpful for creaminess; avocado oil or coconut oil are good choices).
- Salt: 1/4 teaspoon to enhance flavor.
Optional Add-ins For Flavor
Here’s where the fun begins! These extras let you customize your nut butter for healthy yet flavorful snacking:
- Natural sweeteners: 1-2 teaspoons (honey, maple syrup, or agave).
- Spices: 1/2 teaspoon (cinnamon, nutmeg, or pumpkin pie spice).
- Vanilla extract: 1/2 teaspoon for a warm, sweet hint.
- Dark chocolate: 2 tablespoons melted or chopped for indulgent richness.
- Coconut flakes: 2 tablespoons toasted for texture and tropical notes.
- Chia or flax seeds: 1 tablespoon for a nutritional boost.
Tools And Equipment
Making nut butter at home is not only simple but also incredibly satisfying when you have the right tools. With these essentials, you’ll be whipping up creamy, flavorful spreads in no time.
Essential Tools You’ll Need
- High-speed blender or food processor: The powerhouse for achieving a smooth, creamy nut butter. A strong motor is key here.
- Spatula: For scraping down the sides of your blender or processor to ensure every bit is blended properly.
- Baking sheet: Essential for roasting nuts evenly and bringing out their natural oils and flavors.
- Parchment paper: To line your baking sheet and keep cleanup a breeze.
- Airtight jars: For storing your finished nut butter. Glass jars work beautifully for maintaining freshness.
Optional Equipment For Better Results
- Nut grinder: While not necessary, a nut grinder can help achieve an even smoother texture before blending.
- Measuring cups and spoons: If you’re experimenting with flavors, precise measurements can make all the difference.
- Silicone spatula with heat resistance: Perfect for handling warm roasted nuts or scraping hot surfaces.
- Digital kitchen scale: For those who like precision when portioning their ingredients.
- Oven thermometer: Ensures your nuts roast evenly at the perfect temperature without burning.
With these tools in hand, crafting your own nut butter becomes an effortless and delightful process.
Directions
Making your own nut butter is such a rewarding process! With just a few steps, you’ll have a creamy, delicious, and customizable spread that’s perfect for healthy snacking. Let me guide you through the process.
Step-By-Step Guide To Making Nut Butter
- Choose Your Nuts or Seeds: Pick fresh, raw nuts or seeds for the best results. Almonds, cashews, peanuts, and sunflower seeds are great options. You’ll need about 2 cups for a standard batch.
- Roast (Optional but Recommended): Preheat your oven to 350°F (175°C) and line a baking sheet with parchment paper. Spread the nuts in a single layer and roast for 10-15 minutes. Stir them halfway through for even roasting. Roasting brings out natural oils and enhances the flavor. Let them cool slightly before blending.
- Blend to Start: Add your roasted nuts or seeds to a high-speed blender or food processor. Pulse a few times to break them into smaller pieces.
- Blend Continuously: Blend on high speed. At first, the mixture will turn into a crumbly texture. Stop periodically to scrape the sides of the blender with a spatula.
- Pause and Scrape: Always pause every minute or so to avoid overheating your blender or food processor. Scrape down the sides as needed to keep the mixture smooth.
- Reach Creaminess: After about 5-10 minutes of blending, the natural oils will release, creating a creamy consistency. Be patient—this step takes time, but it’s worth it!
- Season and Customize: Once the texture is smooth, add your custom flavors. A pinch of salt for balance, a drizzle of honey or maple syrup for sweetness, or a dash of cinnamon or vanilla extract for extra flavor. Blend again briefly to combine.
- Taste and Adjust: Taste your nut butter and adjust as needed. More salt? A little more sweetness? Make it perfect for your taste.
- Store Properly: Transfer your nut butter into an airtight jar, ensuring there’s no air gap at the top. Store it in the fridge for freshness—it will last up to 2-3 weeks.
Variations On DIY Nut Butter Recipes
Trying your hand at nut butter offers endless possibilities. I absolutely love experimenting with flavors and textures to create healthy, satisfying spreads for snacking. Here are some of my favorite variations you can whip up at home.
Classic Peanut Butter
Peanut butter is a timeless favorite, and making it from scratch lets you skip the unnecessary additives. Here’s how I do it:
- Ingredients:
- 2 cups raw peanuts (unsalted)
- 1 tsp salt (adjust to taste)
- 1-2 tsp neutral oil (optional, for extra creaminess)
Steps:
- Roast peanuts at 350°F on a baking sheet for 8-10 minutes until fragrant. Cool slightly.
- Transfer peanuts to a high-speed blender or food processor. Blend for 5-7 minutes, scraping down the sides as needed, until smooth.
- Add salt and, if needed, a splash of oil for creaminess. Blend again, then store in an airtight jar.
Almond Butter
This rich and creamy almond butter has endless uses as a dip or spread. It’s naturally slightly sweet, which makes it even more indulgent.
- Ingredients:
- 2 cups raw almonds (unsalted)
- 1 tsp salt (optional, for flavor)
- 1 tbsp maple syrup (optional, for sweetness)
- 1-2 tsp oil (optional)
Steps:
- Roast almonds at 350°F for 10-12 minutes for a deeper flavor.
- Blend almonds in a food processor for 10-15 minutes, stopping to scrape the sides and letting the machine rest if it overheats.
- Mix in salt, oil, or maple syrup if desired, and blend again.
Cashew Butter
Smooth, buttery, and mildly sweet, cashew butter is one of my go-to options when I want an extra creamy spread. Plus, cashews don’t always need roasting for a gorgeous flavor.
- Ingredients:
- 2 cups cashews (raw or roasted)
- 1 tsp vanilla extract (optional, for a touch of flavor)
Steps:
- If desired, roast cashews at 350°F for 8-10 minutes for a toastier flavor.
- Blend cashews for 8-10 minutes, stopping as needed, until velvety smooth. Add vanilla at the end and blend briefly to combine.
Hazelnut Cocoa Spread
Think of this as a healthier spin on a classic chocolate-hazelnut spread. It pairs perfectly with fruit, toast, or straight off the spoon.
- Ingredients:
- 2 cups raw hazelnuts
- 2-3 tbsp cocoa powder (unsweetened)
- 2-4 tbsp maple syrup or honey (to taste)
- 1 tsp vanilla extract
- 2 tsp neutral oil (optional, for creaminess)
Steps:
- Roast hazelnuts at 350°F for 10-15 minutes. Once cooled slightly, rub off most of the skins with a clean kitchen towel.
- Blend hazelnuts for 8-10 minutes until smooth.
- Add cocoa powder, maple syrup, vanilla, and oil. Blend until fully incorporated and creamy.
Mixed Nut Butter
When variety sparks my cravings, I combine multiple nuts for a rich, complex flavor profile. Customize it with your favorite mix!
- Ingredients:
- 1 cup raw almonds
- 1/2 cup cashews
- 1/2 cup walnuts
- 1 tsp salt (optional)
- 1-2 tsp oil (optional)
Steps:
- Roast nuts at 350°F for 10 minutes if desired, or keep them raw for a lighter flavor.
- Blend the mixed nuts in a food processor for 10-12 minutes, stopping occasionally to scrape the sides.
- Add salt or oil for smoothness if needed, then continue blending until creamy.
Tips For Success
Making your own nut butter can be a rewarding and healthy addition to your snack routine. Here are my go-to tips to help you achieve perfect, creamy spreads every single time.
Choosing The Right Nuts
The foundation of any nut butter is, of course, the nuts you choose. Here are my top tips for selecting the best ones:
- Use fresh, high-quality nuts: Look for nuts that are raw and unsalted. They should have a natural aroma without any bitterness.
- Consider flavor profiles: Every nut has its unique taste. Almonds lend a mild sweetness while cashews are naturally creamy. Choose nuts that complement the spreads or snacks you plan to pair them with.
- Buy in bulk if possible: I always grab unshelled nuts in bulk for cost savings and freshness. Store any extras in the freezer to maintain quality.
- Blend different varieties: To mix up your snack options, try creating a custom blend like almond-hazelnut or pecan-walnut butter. This keeps things exciting and nutritious.
Troubleshooting Common Issues
Even with the best tools and ingredients, challenges can arise. Here’s how to tackle common problems:
- Butter isn’t creamy enough: If your blender or food processor struggles to achieve creaminess, add a teaspoon of neutral oil like coconut or avocado oil. This helps the mixture emulsify and smooth out.
- Overheating equipment: High-speed blenders can overheat during long runs. Pause every couple of minutes to cool the motor and prevent burning out your machine.
- Grainy texture: Graininess often means the mixture hasn’t blended long enough. Be patient—nut butter requires several minutes of consistent blending to reach the right texture.
- Too thick or dry: If the nut butter feels dry, try adding a little more oil or blending in small amounts of liquid sweetener like maple syrup or agave.
- Tastes flat: A pinch of salt can elevate the flavor of even the simplest nut butter. Taste as you go, and adjust until it’s just right.
Storage And Shelf Life
When it comes to keeping your homemade nut butter fresh and delicious, proper storage is everything. After experimenting with countless recipes over the years, I’ve found that a few key steps make all the difference in preserving flavor and texture while ensuring your spread stays safe to eat for as long as possible.
Proper Containers for Storage
Always store your nut butter in airtight containers. I love using glass jars with secure, sealing lids—they’re durable, non-toxic, and easy to clean. Mason jars are my go-to, but any food-safe, airtight jar works. Ensure the jar is completely dry and clean before transferring your nut butter. Moisture is the enemy here, as it can cause spoilage.
Refrigeration vs. Room Temperature
Most homemade nut butters are best stored in the refrigerator to extend shelf life, especially if you’ve added ingredients like honey, coconut oil, or vanilla extract. Cold storage slows down oxidation and prevents separation. I typically pop my jars into the fridge, where they can last up to 2-3 weeks.
If you prefer a more spreadable consistency, you can leave certain nut butters—like almond or peanut butter—at room temperature. Just keep them in a cool, dark place, such as your pantry. When stored properly, they can stay good for around 1-2 weeks. However, always check for changes in smell or appearance if left at room temp.
| Storage Method | Shelf Life |
|---|---|
| Refrigerator | Up to 2-3 weeks |
| Room Temperature | Approx. 1-2 weeks |
Avoiding Contamination
Always use a clean, dry spoon to scoop out your nut butter. Double-dipping (or introducing any moisture) increases the chances of bacterial growth. It’s a small step, but it keeps your spreads fresher longer. If your nut butter develops an off smell or a strange texture, it’s best to toss it and make a fresh batch.
Signs Your Nut Butter Has Spoiled
As nut butter is a natural product without preservatives, it’s essential to watch for spoilage signs. Look out for rancid smells, mold, or a change in texture. Rancidity is caused by the oils breaking down, which creates a sour or bitter aroma—trust me, it’s hard to miss!
With these tips, you can enjoy the rich, creamy goodness of your nut butters for longer, making your healthy snacking adventures even more rewarding.
Conclusion
Making your own nut butter is such a rewarding experience. There’s something special about creating a spread that’s tailored to your taste, free from unnecessary additives, and bursting with fresh, natural flavors. Plus, the process is simpler than it seems and opens up endless possibilities for customization.
Whether you’re a fan of creamy almond butter, rich hazelnut spreads, or unique combinations, DIY nut butters let you enjoy healthier, tastier options while saving money. With the right tools and a little patience, you’ll be whipping up your favorite spreads in no time.
So grab your nuts, fire up your blender, and get creative. Your homemade nut butter journey is just beginning, and I can promise it’s going to be delicious!


